If you are a new photographer in the world of photography, You must know the Manual best Camera Shooting for the betterment of your shooting camera. Before targeting the camera for shooting you are to learn about manual camera shooting. It will help to capture more beautiful scenes. In this article, I am going to share my practical knowledge and some exclusive tips for manual camera shooting. You will also follow the newsletter to get more information.
Here are some quick tips for manual camera shooting:
Understand the Exposure Triangle:
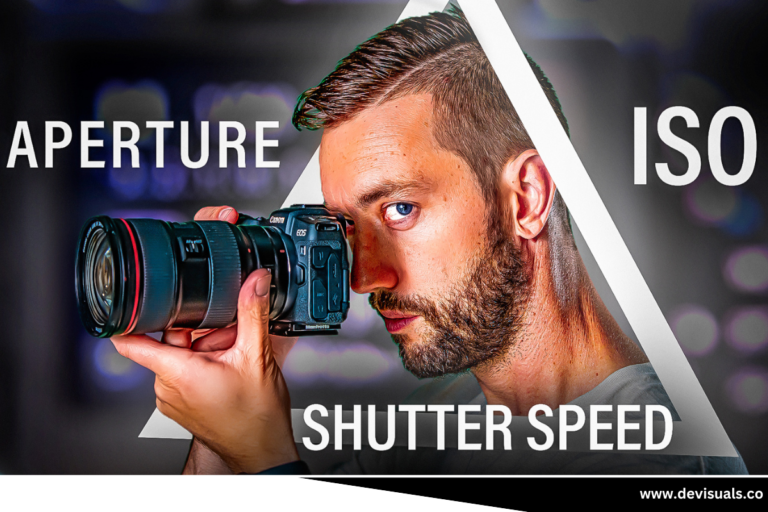
Manual mode gives you control over three key settings: aperture, shutter speed, ISO, and shooting camera. Learn how adjusting these settings affects your photos.
here’s a breakdown of each component:
Aperture: for Depth of Field
You may change the level of sharpness in your image by setting the aperture (f-stop). With a lower f-stop (wider aperture), you obtain a narrower depth of field, and a higher f-stop (smaller aperture) yields a crisper image.
Aperture has a major role in defining depth of field in photography.
It functions as follows:
The aperture of a lens is the diameter of the hole that allows light to pass through. F-stops or f-numbers, such as f/2.8, f/4, and f/8, are used to express it.
Effect on Depth of Field (DOF):: Useful for landscapes or architectural shots, where both foreground and background details need to be sharp. Effect on DOF (depth of field): Depth of field is the range of distance in an image that seems quite clear. When an aperture is larger (lower f-number, like f/2.8), the depth of field is decreased and only a narrower plane of the image is in focus. A lower aperture (bigger f-number, such as f/16) results in a more focused image, covering the entire image from the foreground to the background.
Creative Power: Aperture is used by photographers in creative ways:
- Shallow depth of field: Excellent for close-up shots when the subject pops against a hazy backdrop.
- Deep DOF: Beneficial in pictures of landscapes or architecture where it’s crucial to have distinct foreground and background elements.
Technical Considerations:
- Lens characteristics: Aperture widths (lower f-numbers) vary amongst lenses. These lenses—often called “fast” lenses—are prized for their ability to achieve a small depth of focus.
- Diffraction: When light passes through a tiny aperture, a physical phenomenon known as diffraction causes it to bend and spread. It can make photographs less sharp when using very narrow apertures (high f-numbers, such as f/22 or higher).
preserving balance Exposure: The shutter speed, ISO, and aperture make up the exposure triangle. The aperture can be adjusted to affect how much light enters the camera; a larger aperture lets in more light, therefore for the correct exposure, a faster shutter speed or a lower ISO are required.
It is quite clear how the aperture affects the depth of field; shoot camera allows a photographer to control focus and artistic expression in their images.
Shutter Speed: for Motion
Before going to shoot camera, you have to know that Shutter speed is a critical setting in photography that directly affects how motion is captured in an image.
Here’s how it works and its impact on motion:
Definition: Shutter speed is the amount of time a camera’s shutter is open, letting light onto the sensor. It is measured in seconds or fractions of a second (such as 1/500s, 1/100s, or 1/30s).
Impact on Exposure: The length of the light exposure is managed by shutter speed. While slower shutter speeds, like 1/30s, admit more light and can produce motion blur, faster shutter speeds, like 1/1000s, freeze motion and reduce light.
Creative Effects: In addition to exposure, shutter speed can be creatively used to capture motion. Fast shutter speeds freeze action, whereas lower shutter rates distort moving subjects and create the illusion of motion.
Freezing Motion: A fast shutter speed, such as 1/500s or faster, is used to freeze rapidly moving subjects or motions. Photographing wildlife, sports, or any other event where you want to capture the moment with the least amount of blur is made possible by this.
Blurring Motion: When a shutter speed is set too slowly, as 1/30s or less, motion blur happens, making moving subjects appear hazy in the frame. In creative photography, this technique is often used to capture motion or light trails in nighttime photos.
Creative Control: Shutter speed offers photographers creative control over how motion is depicted:
- Fast Speed: Useful for capturing detailed, sharp images of objects moving swiftly. It is essential while taking pictures of sports or wildlife, for example, or when you want to stop motion.
- Slow Speed: Allows for artistic effects like water slicing across landscapes, light painting, or the suggestion of motion or speed by blurring moving subjects.
Exposure Considerations: Before targeting the camera, you will adjust the shutter speed impact exposure alongside aperture and ISO:
- Fast Shutter Speed: It Reduces the amount of light entering the camera, requiring larger apertures (smaller f-numbers) or higher ISO settings to maintain proper exposure.
- Slow Shutter Speed: It Allows more light in, requiring smaller apertures (larger f-numbers) or lower ISO settings to avoid overexposure.
Stability: When using slow shutter speeds, the highest camera stability is crucial to prevent inadvertent blur from camera motion. Tripods and image stabilization features in lenses and cameras can help maintain sharpness.
Understanding how shutter speed affects motion enables photographers to creatively control the appearance of movement in their images, adding depth and narrative to their compositions.
Shutter speed controls how long the sensor is exposed to light when shooting the camera. Faster shutter speeds freeze motion, while slower speeds can create motion blur. Use fast speeds for action shots and slow speeds for creative effects.
ISO: for Light Sensitivity
ISO (International Organization for Standardization) in photography refers to the sensitivity of the camera’s sensor or film to light.
Here’s how ISO affects light sensitivity and its implications in photography when shooting cameras:
Definition: ISO measures the light sensitivity of the optimal camera sensor. While lower ISO values, like ISO 100, are less sensitive and typically employed in bright conditions, higher ISO numbers, such as ISO 1600 and ISO 3200, increase sensitivity for low-light situations.
Effect on Exposure: You can shoot photos in low light conditions by raising the ISO without needing to use a larger aperture or longer exposure times. However, using higher ISO settings may result in more digital noise and worse image quality.
Noise Reduction: Although newer cameras can withstand higher ISO settings than older ones, it’s still critical to understand how well your best camera reduces noise to maintain high-quality images.
Creative Control: ISO settings offer you flexibility in various lighting conditions:
Low ISO (e.g., ISO 100): It is Ideal for bright conditions where plenty of light is available. Results in cleaner images with minimal noise.
Medium ISO (e.g., ISO 400): This medium ISO is Suitable for average lighting conditions, offering a balance between sensitivity and image quality.
High ISO (e.g., ISO 1600 and above): It is used in low-light situations or when faster shutter speeds are needed to freeze motion. Increases noise but allows you to capture images in challenging lighting.
Balancing the Exposure Triangle:
- Changing one element of the exposure triangle affects the others. For example, if you raise the aperture (wider), you may need to adjust by lowering the ISO or decreasing the shutter speed (faster) to maintain a balanced exposure.
- Mastering manual mode requires knowing how to tweak these settings to achieve the desired exposure and aesthetic effects for different shooting situations.
Dynamic Range: Using higher ISO settings can reduce the camera’s dynamic range and make it more difficult for the device to capture information in highlights and shadows. This is particularly pronounced in older cameras or devices with smaller sensors.
Auto ISO: Many best cameras offer Auto ISO mode, where the camera adjusts ISO automatically based on the available light and other exposure settings. This can be convenient in changing lighting conditions but requires monitoring to ensure the desired image quality.
Practice and Experimentation:
Learn how to use the manual mode on your best camera so you can grasp the relationships between ISO, shutter speed, and aperture.
Try varying the setup and observe the effects on exposure, depth of field, and motion blur.
Examine your photos to see the changes you made, and get comfortable with a manual camera.
By completing the setting of the exposure triangle, you gain greater control over your photography, enabling you to capture images with precision and creativity in various lighting conditions when shooting cameras.
Metering Modes:
To find the ideal camera for measuring light and adjusting exposure, familiarize yourself with the metering modes on your camera (evaluative, spot, and center-weighted).
When a camera measures the amount of light in a scene, it uses metering modes to adjust the exposure (aperture, shutter speed, and ISO). Diverse metering modes offer distinct approaches to assessing light, appropriate for diverse photography situations.
Here are the common metering modes found in modern digital cameras when shooting camera:
Matrix/Evaluative Metering: This mode measures the light levels across the frame by segmenting the scene into many zones. To determine the ideal exposure, it takes into account variables including brightness, contrast, color, and subject distance. Because of its versatility, matrix metering can be used in a range of shooting situations where there are both bright and dark portions in the picture.
Center-Weighted Metering: The ideal camera prioritizes light readings from the center of the frame (usually between 60 and 80 percent of the frame) when using center-weighted metering. When the subject is in the middle of the composition, it serves a purpose. In situations like portraiture, where the subject’s exposure is crucial, center-weighted metering is frequently employed.
Spot Metering: This method measures the quantity of light in a very small area of the frame, usually one to five percent of the total image area. The metering point is often the active autofocus point, though it can also be chosen manually. When the subject is backlit or you want exact control over exposure for a certain area of the picture, such as a face in a portrait against a bright background, this setting comes in handy.
Partial metering: Similar to spot metering, it measures a larger area (about 10%–15% of the frame). Although it is less focused than spot metering, it could be useful in situations where you need more exposure control than what evaluative/matrix metering can provide. Partial metering is often used for portraits or situations where the main subject is placed against a reasonably consistent background.
Average Metering: In this mode, the average light measurement from the entire frame is calculated. Evaluative/matrix metering is less common in modern digital cameras because it usually produces more accurate exposure readings under a variety of shooting scenarios.
Choosing the Right Metering Mode:
- General Shooting: Matrix/Evaluative metering is a good default choice for most situations, providing balanced exposure across the frame.
- Portraits: Center-weighted or spot metering can help ensure accurate exposure of the subject’s face or important details.
- Backlit Subjects: Spot metering allows you to expose the subject rather than the bright background.
- High-Contrast Scenes: Spot or partial metering can prevent overexposure of bright areas or underexposure of shadows.
Understanding metering modes and their applications allows you to achieve accurate exposures and maintain creative control over your images in various lighting conditions when shooting cameras.
White Balance:
when you shoot the camera you will Adjust white balance settings to ensure accurate colors under different lighting conditions. You can set it manually or use presets (e.g., daylight, cloudy, tungsten).
White balance in photography refers to the adjustment of colors in an image to accurately represent how colors appear in real life, particularly under different lighting conditions. It ensures that whites appear truly white, rather than having a color cast due to the color temperature of the light source.
Here’s a detailed explanation of white balance:
Color Temperature: Different light sources emit light at different color temperatures measured in Kelvin (K):
- Higher Kelvin (e.g., 5000K-10000K): Cooler/blue tones, typical of overcast skies or shade.
- Mid-range Kelvin (e.g., 4000K-5000K): Neutral white light, similar to daylight.
- Lower Kelvin (e.g., 2000K-4000K): Warmer/yellowish tones, typical of incandescent bulbs or sunset.
Purpose of White Balance: Although the human eye automatically adjusts to changing lighting conditions, color accuracy in camera calibration is dependent on the camera’s calibration. Improper white balance may result in images with a noticeable color cast, such as excessively warm (orange/yellow) or cold (blue) tones.
White Balance Settings:
- Auto White Balance (AWB): The best cameras will adjust the white balance automatically based on the color temperature of the light source. While it works well and is useful in many situations, it may not always provide accurate findings, especially in poorly lit places.
- Presets (such as Daylight, Shade, Cloudy, Tungsten, and Fluorescent): Because they correspond to specific color temperatures, these settings are useful for taking pictures in known lighting conditions. They provide more accurate color reproduction than AWB under those conditions.
- Custom White Balance: You can manually set the white balance using a neutral gray card or a recognized reference to ensure precise color integrity.
- Kelvin Temperature: Some of the better cameras allow you to set the white balance using the exact Kelvin temperature for more accurate adjustments.
Creative Use of White Balance:
- Warm vs. Cool Tones: Altering an image’s white balance can affect the mood and atmosphere of the picture. Warmer tones might evoke sentiments of comfort or nostalgia, while cooler tones can suggest a sense of tranquility or detachment.
- Correcting Color Casts: When exact color reproduction is needed, this is crucial for product, landscape, and portrait photography.
Post-Processing: White balance adjustments can also be made at this stage using software such as Adobe Lightroom or Photoshop. This flexibility allows photographers to alter the hue of the image after it has been taken.
By mastering white balance, photographers may enhance realism and effectively communicate the desired mood or atmosphere of the scene through accurate color reproduction.
Focus Manually:
Depending on the topic and the conditions of the shot, you might have more control over whether portions of the image are sharp when using manual focus. Use autofocus for speed and convenience of use; use manual focus for precision.
Using your hands to manually focus the ideal lens in photography is known as manual focusing, as opposed to relying on the autofocus (AF) functions included in the camera.
This is a comprehensive guide to manual focusing:
Why Manual Focus?
- Precision: Focus placement inside the frame can be precisely controlled with manual focusing; this is especially useful for macro photography, landscapes, and situations where autofocus would struggle (dark lighting, complex subjects, etc.).
- Creative Control: It enables photographers to intentionally blur specific image regions to draw attention to specific elements or provide a striking artistic effect.
- Reliability: In certain situations, manual focus may be more dependable than autofocus, such as when photographing subjects with repetitive patterns that confuse AF systems or when using older lenses.
Steps for Manual Focusing:
- Switch to Manual Mode: Set your lens to manual focus mode by using the lens barrel switch.
- Use the Focus Ring: Turn the focus ring on the lens barrel to adjust the focus. The sensitivity and orientation of the focus ring vary throughout lenses (some are quicker, while others have a longer throw for finer adjustments).
- Magnification: A feature found in many of the best cameras is focus magnification, commonly referred to as focus peaking. By zooming into the image preview on the LCD screen or viewfinder, you may accurately adjust focus on a small region. This is especially useful for achieving critical focus in macro photography or when using wide apertures for shallow depth of field.
- Depth of Field Preview: Some cameras have a depth of field (DOF) preview button that stops the lens aperture to the selected f-stop, giving a more accurate display of the depth of field and helping with manual focus correction.
When to Use Manual Focus:
- Low Light: Because autofocus systems sometimes have issues in low light, manual focus is more dependable than autofocus systems.
- Macro Photography: Often, manual focus is a more straightforward method of achieving precise focus on close-up objects.
- Landscapes: You want to ensure that the entire image is sharply focused while using lower apertures to gain the maximum depth of field.
- Moving Subjects: When a subject is moving irregularly or when there is distracting background material that could confuse autofocus.
- Practice and Familiarization: Gaining proficiency with manual focus requires both practice and familiarity with your camera’s focusing system. With time, you’ll develop an instinct for how much of a sharpness you want from the focus ring.
Modern Assistance: Some modern cameras have electronic assistance built-in, including focus peaking, which highlights the areas of the image that are sharp and helps with manual focusing by making it easier and more accurate. This is especially helpful when using lenses with a limited depth of field.
Manual focusing remains a valuable skill in photography, offering both technical precision and creative control over the final image in a shooting camera.
Bracketing:
bracketing in photography refers to the technique of taking multiple shots of the same scene with varying settings, typically exposure, to ensure at least one of the shots captures the scene correctly.
If you are unsure of the correct exposure, use exposure bracketing to take several shots at different exposures. This ensures you capture the best possible exposure.
Here’s a detailed explanation of bracketing:
Purpose of Bracketing:
- Exposure: The most popular application of bracketing is exposure bracketing. This means shooting a series of images with different exposure settings, usually varying the shutter speed while keeping the aperture and ISO constant, to ensure that at least one image is properly exposed. Using bracketing helps photographers deal with challenging lighting conditions, such as photos with a lot of light-shadow contrast.
Types of Bracketing:
- Exposure Bracketing: This method comprises multiple exposure settings shots of the same subject. Typically, three shots are taken: one with the exposure set to the metered setting, one with the exposure lowered or raised by one or two stops, and one with the exposure set to the maximum amount. With current cameras, you may set both the number of photographs and the exposure increment.
- White Balance Bracketing: A few cameras are equipped with a feature called White Balance Bracketing, which enables the best camera to take multiple images with different white balance settings (e.g., warmer and colder tones). This can be useful when you don’t know how to get the ideal white balance or when the lighting isn’t consistent.
- Focus Bracketing: This method, which is especially helpful in macro photography or when using very wide apertures where the depth of field is minimal, entails taking a series of pictures at slightly changing focus distances.
- High Dynamic Range (HDR) Bracketing: This technique enlarges an image’s dynamic range by taking several pictures at various exposures, and then merging them later to show details in the shadows and highlights of the image.
How to Use Bracketing:
- Configuration: A dedicated button or menu can be used to access the bracketing mode that most cameras offer. In addition to selecting the type of bracketing (exposure, white balance, etc.), you can also change the number of shots and exposure increments.
- Shooting: All you need to do is press the shutter once to begin bracketing. The best camera will automatically capture the predetermined number of photos with the chosen settings.
- Post-Processing: After shooting, review the bracketed images to select the best one, or use programs designed specifically for HDR bracketing to merge them using software like Adobe Lightroom.
Benefits of Bracketing:
- Ensures Correct Exposure: Assists in cases when the camera’s metering may be problematic in places that are excessively bright or dark.
- Greater Flexibility: Offers alternatives for imaginative post-processing decision-making, such as hand-picking the optimal exposure or combining exposures for HDR.
- Lowers Risk: Lowers the chance that inadequate illumination will make it impossible for you to take a properly exposed photo.
Bracketing is a valuable technique in photography, It offers you more control over exposure and enhancing the ability to capture scenes accurately in various lighting situations.
RAW Format:
In photography, a file type known as RAW, which is unprocessed and uncompressed by the camera’s software, represents all of the data that the sensor of the camera is capable of capturing.
If at all feasible, shoot in raw. RAW files provide you with more artistic freedom over post-processing, particularly with exposure and white balance adjustments. They also have more statistics.
A thorough description of the RAW format and its importance for photography may be found here:
Definition and Characteristics:
- Uncompressed Data: RAW files come straight from the greatest camera sensor and contain raw, unedited data. In contrast to JPEG files, which undergo in-camera processing and compression, RAW files preserve every bit of the original data that was taken by the sensor.
- Flexibility: RAW files offer more creative post-processing choices since they contain more information about the image, including dynamic range, color information, and details in highlights and shadows. As a result, photographers can adjust white balance, exposure, contrast, and other parameters without compromising the quality of their photos.
- Higher Bit Depth: RAW files frequently include bit depths of 12 bits, 14 bits, or even 16 bits, which results in richer color depth and smoother tonal transitions than JPEGs, which are occasionally only 8 bits deep.
Advantages of Shooting in RAW:
- RAW format is best suited for high-end, professional photography since it maintains the best possible image quality right out of the camera sensor.
- Broad Editing Capabilities: RAW files hold more information, enabling photographers to make non-destructive modifications, fix exposure mistakes, adjust white balance, and bring back details in highlights and shadows using programs like Adobe Lightroom, Capture One, or Adobe Camera Raw.
- No Lossy Compression: RAW images preserve the highest level of image integrity because no image data is erased during processing, in contrast to JPEGs, which use lossy compression.
- Creative Control: RAW files provide you the freedom to adjust specific areas of the picture, convert to black and white, or try out various color profiles without compromising the final product’s quality.
Considerations When Shooting in RAW:
- File Size: Because RAW files are uncompressed and have greater bit depth than JPEGs, they are larger in size. This implies that they need more room on memory cards and hard storage drives.
- Workflow for Post-Processing: Compared to JPEGs, RAW data demands more computer power and time to process and edit. For dedicated photographers, though, the benefits of quality and control frequently exceed these drawbacks.
- Compatibility: For editing software to be compatible with RAW files, it may be necessary to update the software or add plugins, as RAW files are unique to each camera model.
RAW vs. JPEG:
- JPEG: JPEG is practical for daily photography due to its smaller file size, instant usefulness, and compatibility with a wide range of hardware and software. JPEGs, on the other hand, are less flexible in post-processing and may lose quality after several adjustments.
- RAW: Recommended for professional photography and situations where flexibility in post-processing and the best possible image quality are essential. RAW files provide more control over image alterations and provide the highest level of image quality.
In summary, photographers who shoot in RAW format have total control over the post-production processing of their images. This makes it possible to make significant artistic adjustments without compromising the quality of the images.
Let’s know some extra tips that are beneficial after knowing manual camera shooting. You will be a perfect photographer if you follow this advice and utilize it in the time of shooting a camera.
Practice and Experiment:
Mastering the manual mode calls for practice. Try out several combinations to gain insights, then assess the outcomes. You can inspect your photos on-site and adjust the settings if needed.
Photography practice and experimentation are vital to honing abilities, establishing a personal style, and boosting creativity in general.
Here’s how to investigate and practice efficiently using a camera:
Establish Clear Objectives: Select the techniques or abilities you wish to study or gain experience with. Having clear goals for your practice sessions will help direct them, whether they are focused on refining exposure, comprehending composition principles, experimenting with different lighting approaches, or discovering new genres.
Frequent Practice Sessions: Set aside time regularly to practice taking pictures. This might happen every day, every week, or as frequently as your schedule permits. Maintaining consistency enables you to gradually improve your talents and reinforces what you’ve learned.
Explore Various Genres: Experiment with a range of photographic genres to broaden your skills and find what appeals to you. Take into account shooting portraits, macro photographs, street scenes, people, places, and animals. Every genre offers a unique set of challenges and opportunities for artistic expression.
Push Your Boundaries: To push the limit, give oneself tasks or set challenges. For example, give yourself a challenge to shoot just in black and white for a week, focus on capturing emotions in portraiture, or take creative photos of everyday objects. Difficulties encourage originality and creative thinking.
Learn from Others: Examine the shots taken by photographers you respect. Examine their methods, arrangements, lighting, and narrative strategies. Make use of this information to motivate yourself to practice and try experimenting with bringing fresh concepts into your shots.
Try Out Some Equipment: Get familiar with your camera and its accessories by experimenting with different lenses, settings, and attachments like tripods and filters. Understand the functions that each piece of equipment serves in your photography and discover how to make the most of it.
Practice Following Processing: Post-processing is a crucial part of digital photography. Try out various photo-editing software, such as Adobe Lightroom or Photoshop, to enhance your images, experiment with color corrections, use filters, and develop your style. Try out different editing techniques to observe how they impact the finished piece.
Seek input: Present your work to loved ones, friends, photography clubs, online discussion boards, and seminars. Acknowledgment of your achievements through constructive criticism might highlight your areas of improvement.
Note Your Progress: Keep a diary or portfolio where you may document your efforts, successes, and failures. You can track your development and identify areas that require more work in your next practice sessions by reflecting on your journey.
Enjoy the Process of Learning and Exploring Photography: Have Fun and Stay Curious. Continue to be inquisitive about emerging methods, tools, and creative forms. Accept setbacks as teaching moments and acknowledge your progress with joy.
You can build a distinct photographic style and artistic vision in addition to honing your technical abilities by practicing frequently and accepting experimentation. Continue pushing yourself and seeking out new opportunities if you want to advance as a photographer.

