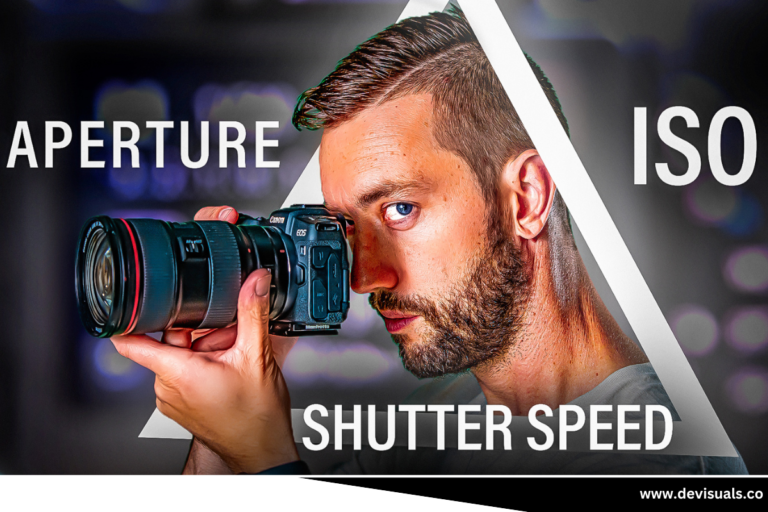
This post breaks down the Exposure Triangle aperture, shutter speed, and ISO and how these elements work together to affect the lighting in your photos and videos. You’ll learn how to adjust each component to suit different lighting conditions and what order to tackle these adjustments for various shooting scenarios. We also touch on troubleshooting exposure issues to help you remember everything.
What is the exposure triangle?
First of all, you need to know what is an exposure triangle. The exposure triangle, a fundamental concept in photography, illustrates the relationship between the three main parameters that determine an image’s exposure:
Aperture:
The size of the hole in a lens that allows light to flow through is called its aperture. F-stops, such as f/2.8, f/4, and f/5.6, are used to measure it. More light can enter an aperture with a lower f-number, such as f/2.8, which indicates a bigger aperture opening. Additionally, depth of field the range of distance that appears to be reasonably crisp in an image is controlled by the aperture.
Shutter Speed:
The duration that the camera’s shutter stays open to let light onto the sensor is known as the shutter speed. It is measured in seconds or fractions of a second, as 1/1000s, 1/250s, or 1s. A quicker shutter speed of 1/1000s allows less light to reach the sensor but freezes motion, whereas a slower shutter speed of 1/30s lets in more light and can cause motion blur.
ISO:
ISO measures the light sensitivity of the camera sensor. At lower ISO 100 and higher ISO 1600, the sensor’s sensitivity to light increases and decreases, respectively. Raising the ISO will let you capture photos in low light, but it will also introduce digital noise, or graininess, into the image.
Together, these three elements aperture, shutter speed, and ISO determine the exposure of a photograph. Adjusting one of these settings affects the others, so You must balance them carefully to achieve the desired exposure while also considering the creative effects each setting can produce depth of field, motion blur, and noise.
In what order should I adjust these settings?
There is no defined order for changing the exposure parameters (aperture, shutter speed, and ISO). Instead, the changes are often dictated by the specific requirements of your image and the desired creative result.
However, as a general guideline, this is useful to many photographers:
Start with the aperture:
Set the aperture first if your shot’s depth of field that is, the percentage of the scene that is in focus is important. For shallow depth of field (blurred backdrop, subject isolation), use a wider aperture (lower f-number like f/2.8); for a deeper depth of field (more of the scene in focus), use a smaller aperture (larger f-number like f/11).
Adjust the shutter speed:
To get the right exposure once you’ve adjusted the aperture, change the shutter speed. Use a shutter speed of 1/500s or faster if you need to freeze motion. Use a slower shutter speed (such as 1/30s or slower) if you want to add motion blur or if you need additional light.
Fine-tune with ISO:
After setting the shutter speed and aperture, change the ISO to fine-tune the exposure. Then, you will raise the ISO to brighten the picture in poor light; however, take care not to add noise. Again, you will reduce the ISO under bright light to maintain image quality and reduce noise.
Re-assess and make adjustments as needed:
Once the initial adjustments have been made, review the picture using the LCD screen or the camera’s viewfinder. Moreover Check the exposure, depth of field, and any desired artistic effects. To obtain the desired image, make one more adjustment to the parameters in light of the results.
Keep in mind that the sequence of adjustments may change depending on the creative aims and shooting circumstances. For example, you may set the ISO first in low light conditions to make sure you can get enough light, and then you can modify the aperture and shutter speed as necessary. Gaining a thorough understanding of the interactions between these settings will boost your confidence in your ability to make fast adjustments to get the ideal exposure for your shots.
Adjusting Aperture:
Aperture adjustment is one of the most important photographic skills since it controls not only the amount of light entering the camera but also the depth of focus, which affects how distinct or blurry your foreground and background seem in your pictures.
Use these easy methods to adjust the aperture:
Understand Aperture Values:
An f-stop, such as f/2.8, f/4, f/5.6, and so on, is used to express aperture. A smaller f-stop number, such as f/2.8, implies a larger aperture opening and allows more light to pass through. An aperture with a narrower opening and a higher f-stop number, such as f/11, can let in less light.
Set Your Camera to Aperture Priority Mode (A or Av):
In aperture priority mode, you can manually choose the aperture and the camera will automatically adjust the shutter speed to get the desired exposure. Set your camera’s mode dial to ‘Av’ (for Canon and other models) or ‘A’ (for Nikon).
Adjust the Aperture:
Use the main control dial, which is often located adjacent to the shutter button, to change the aperture value. As you make modifications, notice how the aperture values f/2.8, f/4, f/5.6, etc. change.
Effects of Aperture:
Depth of focus:
A wide aperture low f-number, like f/2.8, softens the background while keeping the subject crisp (perfect for portraiture), producing a shallow depth of focus.
Background Blur(bokeh):
Larger apertures yield bokeh or background blur, which is easier to see and contrasts your subject with a softer, out-of-focus background.
Lens Sharpness: Lenses can be pretty good at a range of apertures, but they work best when stopped down somewhat, between f/5.6 and f/8.
Consider Lighting Conditions:
You may need to choose a smaller aperture (a higher f-number, such as f/8 or larger) to avoid overexposure in strong illumination. When light levels are low, use a larger aperture and a lower f-number, like f/2.8 or f/4, to capture more light.
Exercise and Trial:
Take several pictures of the same scene to examine how different aperture settings affect your pictures. Try experimenting with different subjects to observe how aperture influences your capacity for creative thought.
Once you master aperture settings, you will have more control over your photography and be able to capture images with varying degrees of focus and artistic effects.
Adjusting Shutter Speed:
Shutter speed modification is crucial to photography to control how motion is captured in your images.
To modify shutter speed efficiently, adhere to the following easy steps:
Identify the Values of Shutter Speed:
The fractions of a second that are used to describe shutter speed are 1/500, 1/250, and 1/125 seconds. A greater shutter speed, like 1/500s, freezes action, whereas a slower shutter speed, like 1/30s, allows for more motion blur.
Set Your Camera to Shutter Priority Mode (S or TV):
To manually adjust the shutter speed while the camera automatically adjusts the aperture to obtain the desired exposure, put your camera in Shutter Priority Mode (S or TV). Set the mode dial on your camera to ‘S’ for Nikon cameras or ‘TV’ for Canon and other models.
Adjust the Shutter Speed:
To adjust the shutter speed, turn the main control dial, which is often situated close to the shutter button. Turn the slider to freeze still subjects at quicker shutter speeds like 1/500s or 1/1000s, or to capture motion blur at slower shutter speeds like 1/30s or 1/15s.
What is a shutter speed tester?
A shutter speed tester is a device used to measure the exact duration for which a camera’s shutter remains open when taking a photograph. It’s crucial in photography to ensure correct exposure and capture motion appropriately.
There are various types of shutter speed testers:
Electronic Shutter Speed Testers: These devices electronically measure the length of time. The shutter truly opens when the camera’s shutter is released.
Mechanical shutter speed testers: Mechanical shutter speed testers, which are older devices, measure how long a shutter is left open using physical methods. They frequently use a rotating disc that has a tiny aperture that exposes a film strip or light-sensitive cell.
Software-Based Shutter Speed Testers: After images have been shot, certain modern camera testing software may also analyze and measure shutter speed using exposure data or timestamp analysis.
Shutter speed tests are used by photographers, technicians, and camera manufacturers to ensure that a camera’s shutter operates exactly as intended. This ensures that exposure times for photos are precise and reliable.
Effects of Shutter Speed:
- Freezing Motion: When photographing fast-moving subjects, such as wildlife or sports, use a faster shutter speed to capture the minute details.
- Motion Blur: Artistic photography or capturing flowing water benefits greatly from the motion blur effect that slower shutter speeds provide. This effect can convey a feeling of motion or speed.
Consider the Lighting:
To avoid overexposure, you may need to use faster shutter speeds in bright lighting. In low light, slower shutter speeds are necessary to allow sufficient light to reach the sensor.
Use a Tripod (for Slow Shutter Speeds):
To prevent camera shake, which can lead to an utterly blurry image, steady your camera on a tripod when using slow shutter speeds (such as 1/30s or below).
Practice and Experiment: Take several pictures of the same object using various shutter speeds, then note how each one influences the final image. Try varying shutter speeds, from quick to leisurely, to improve your comprehension of motion in photography.
You might have more creative control over how you capture motion and artistic features in your photos if you know how to work with shutter speed settings.
Adjusting ISO:
In photography, setting the ISO (International Organization for Standardization) is crucial for managing the light sensitivity of your camera’s sensor.
Here are some quick steps for efficiently adjusting ISO:
Understand ISO Values:
The range of ISO values is from low ISO 100 to high ISO 3200 or above. Photographs taken at lower ISO settings are less sensitive to light, but they are clearer and less noisy. In low light, higher ISO settings with more sensitivity are advantageous, but they may also produce more noise.
Set Your Camera to Manual Mode (M) or ISO Priority Mode:
In manual mode, you have total control over the ISO, shutter speed, and aperture. To obtain the proper exposure, the camera adjusts the shutter speed and aperture in addition to setting the ISO in ISO Priority mode, if it is available. Turn the mode dial (whatever one matches your camera model) to alternate between ‘M’ and ‘ISO’ mode on your camera.
Adjust the ISO:
Use the control dial to change the ISO value. Check your camera’s display or viewfinder to see the current ISO setting. Increase ISO for low-light situations or decrease it for bright conditions.
Effects of ISO:
Low ISO (e.g., ISO 100): Produces images with less noise and finer details in good lighting conditions.
High ISO (e.g., ISO 1600+): Increases sensitivity to light, useful in low-light conditions but can result in more visible noise or grain.
Think About Noise Levels:
If you intend to print or enlarge your photos, try to keep the ISO as low as possible to reduce noise. Carefully adjust higher ISO settings to balance exposure without sacrificing image quality.
Monitor Exposure:
Before increasing the ISO, make sure the exposure meter in the LCD or viewfinder of your camera is set appropriately. If you’re shooting in manual mode, adjust the shutter speed or aperture as needed to keep the right exposure levels.
Practice and Experiment:
To learn how ISO influences noise levels and image quality, take test shots at various ISO settings. To find the best ISO settings for various situations, conduct experiments in a variety of lighting conditions.
By mastering ISO adjustments, you can effectively control image brightness and noise levels in your photography, enhancing your creative capabilities across different shooting conditions.
Iso vs shutter speed
ISO and shutter speed are two fundamental concepts in photography that affect how light is captured and the appearance of motion in a photograph:
ISO (International Organization for Standardization):
The term ISO in photography refers to the sensitivity of the camera sensor to light or film sensitivity. A lower ISO number (such as ISO 100) indicates a reduced sensitivity to light, which means the sensor requires more light to take an appropriately exposed photo. Increased light sensitivity and the ability to take low-light photos without a flash are indicated by higher ISO numbers, such as ISO 1600 or above. They may, however, also accentuate noise or graininess in the image.
Shutter Speed:
The shutter speed controls how long light is exposed to the camera’s sensor. Its fast shutter speed (e.g., 1/1000s) freezes motion and records swift movements, which makes it ideal for taking pictures of sports events and moving subjects. For artistic effects, nocturnal light trails, and waterfall flows, a slow shutter speed (such as 1/30s or slower) lets in more light and creates motion blur. Shutter speed is also crucial for preventing camera shake while taking handheld pictures in low light; a faster shutter speed reduces the chance of blur from trembling hands.
Relationship and Balance:
The exposure triangle is formed by the relationship between the ISO, shutter speed, and aperture, or the diameter of the lens opening. A change in one has an impact on the others: a change in shutter speed modifies exposure and records motion differently; an increase in ISO increases sensor sensitivity but may also introduce noise.
Shutter speed controls the duration of the sensor’s exposure to light, whereas ISO controls the sensitivity of the camera sensor to light. To get the correct exposure and photographic results, both settings are needed.
Troubleshooting
Finding and correcting exposure setting errors is the first step in troubleshooting exposure issues in photography and producing a well-exposed shot.
Some common exposure issues and their fixes are as follows:
Image too dark (underexposed):
- Increase ISO: When taking photos in low light, you may want to increase the ISO sensitivity to make the sensor more sensitive to light.
- Lower shutter speed: Use a slower shutter speed to allow more light to reach the sensor. Be cautious when taking pictures of moving subjects to prevent creating motion blur.
- widen the aperture: Choose a larger aperture (lower f-number) to allow more light to enter the camera.
- Confirm exposure compensation: Some cameras have exposure compensation settings that you can use to manually adjust exposure up or down.
Image too bright (overexposed):
- Lower ISO: To lessen the sensor’s sensitivity to light, lower the ISO sensitivity.
quicker shutter speed: To cut down on the amount of light that reaches the sensor, use a quicker shutter - speed. Narrow the aperture: To lower the amount of light entering the camera, select a smaller aperture (bigger f-number).
- Apply exposure compensation: If your camera permits it, set exposure compensation to slightly underexpose the picture.
Depth of field issues:
- Aperture adjustments: If the desired depth of field isn’t being attained, adjust the aperture as needed (it might be too shallow or too deep). Use a larger aperture for a shallower depth of field and a smaller aperture for a deeper depth of field.
- Focus point: Make sure your focus point is positioned correctly on your topic to achieve the right sharpness.
Motion blur:
- Increase shutter speed: If your subject is moving, use a faster shutter speed to freeze the motion.
- Use a tripod: Balance your camera on a tripod to avoid camera shake in poorly light locations or when using slower shutter speeds.
Noise (graininess):
- Lower ISO: High ISO settings have the potential to generate noise. Select the lowest ISO that is suitable for the lighting to minimize noise.
- Use noise reduction: Some cameras have built-in noise reduction options that can improve the quality of high-ISO photographs.
- Post-processing: Noise reduction can also be applied at this stage using software such as Adobe Lightroom or Photoshop.
White balance issues:
- Adjust white balance: Use the camera’s settings or create a custom adjustment to get rid of color casts caused by different lighting.
- Shoot in RAW: You have more flexibility over post-processing white balance adjustments when you use RAW format photography.
It’s critical to comprehend how each exposure setting aperture, shutter speed, and ISO affects the image and how they interact with one another while troubleshooting exposure difficulties. You’ll have a better understanding of exposure management under different shooting settings with practice and experimentation.

